A Better Development Experience with Jupyter Notebooks in VS Code
In one of my work projects, we have taken to using Jupyter Notebooks quite extensively as a useful mode for presenting tutorials of our code base and even example use cases. Notebooks allow for users or developers to incrementally step through workflows and see how each stage works in detail. What’s more, they can easily inspect intermediate objects in the workflows, and this can be an important debugging tool. I personally do this all the time.
However, there are a few issues with Jupyter Notebooks in a development setting. First, the default
notebook .ipynb file format is terrible for storing in version control. It is basically a JSON
file, and the real problem is it tracks far too much metadata that changes depending on the
environment in which the notebook is run. The cleanest solution I have encountered for this is a
tool called jupytext.
jupytext’s approach is to pair the ipynb Classic Notebook format with a simpler Python source
file, called a Text Notebook, which can be more cleanly tracked in version control. Only the
text notebook is tracked because the the ipynb notebook can be reproducible regenerated from
the Python source file by jupytext. jupytext is able to achieve this by using some special
markup in the text notebook. The markup can be conveyed through a variety of formats, but the most
popular and robust seems to be
the percent
format or what jupytext calls py:percent.
Very quickly, notebook cells are delimited by # %%. Cell types can be specified with square
brackets after this delimiter, e.g. a Markdown formatted cell is indicated by # %% [markdown].
All together, you get something that looks like this (taken from the jupytext documentation):
# %% [markdown]
# This is a multiline
# Markdown cell

# %% [markdown]
# Another Markdown cell


# %%
# This is a code cell
class A():
    def one():
        return 1

    def two():
        return 2
Note: the text notebook is always a valid Python script regardless of the format of the text notebook. Therefore, you can always run
python text_notebook_filename.py, and it will work.
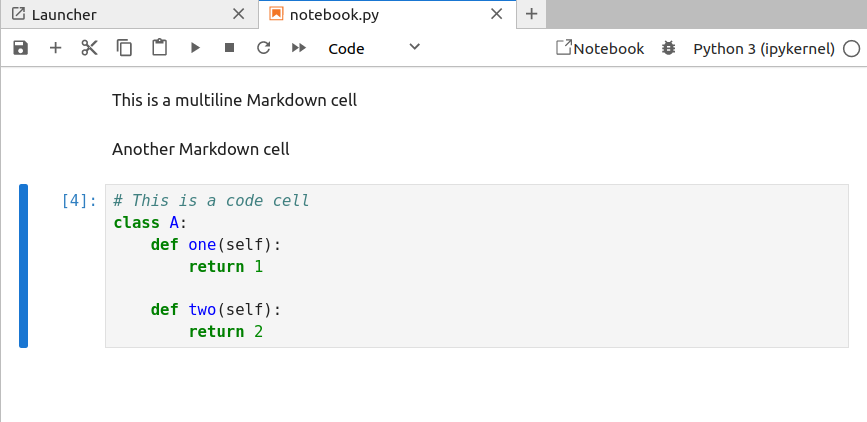
If you use the web interface for Jupyter (Lab or Notebook) and have installed the jupytext package
in your environment, then you should be able to directly open any Python source file in percent
format and have it rendered exactly as a normal .ipynb notebook. This is what the above file
looks like when rendered in the usual Jupyter Notebook (actually JupyterLab) interface:
The jupytext plugin will automatically handle ensuring that the .py source is updated as you
make changes in this notebook editing mode. You can also directly “pair” the text notebook .py
file with a traditional Jupyter notebook .ipynb file by going to
File > Jupytext > Pair Notebook with ipynb document.
Once again, jupytext will handle making sure that the two files are synchronised.
If you are happy editing notebooks in the Jupyter{Lab,Notebook} interface, then this is case closed.
As long as you only make changes here, jupytext handles the file syncing and saving, and then it
is only up to you to commit changes to the text notebook .py file in your version control.
On the other hand, if you are a VS Code user like me and prefer editing notebooks from its
interface, the situation is slightly less convenient because VS Code does not interface with the
jupytext plugin. You can edit the .py files directly as you would any Python source file without
a problem, but if you want to execute this file like it is a notebook, you will need to use VS
Code’s Interactive Window feature of its Jupyter integration.
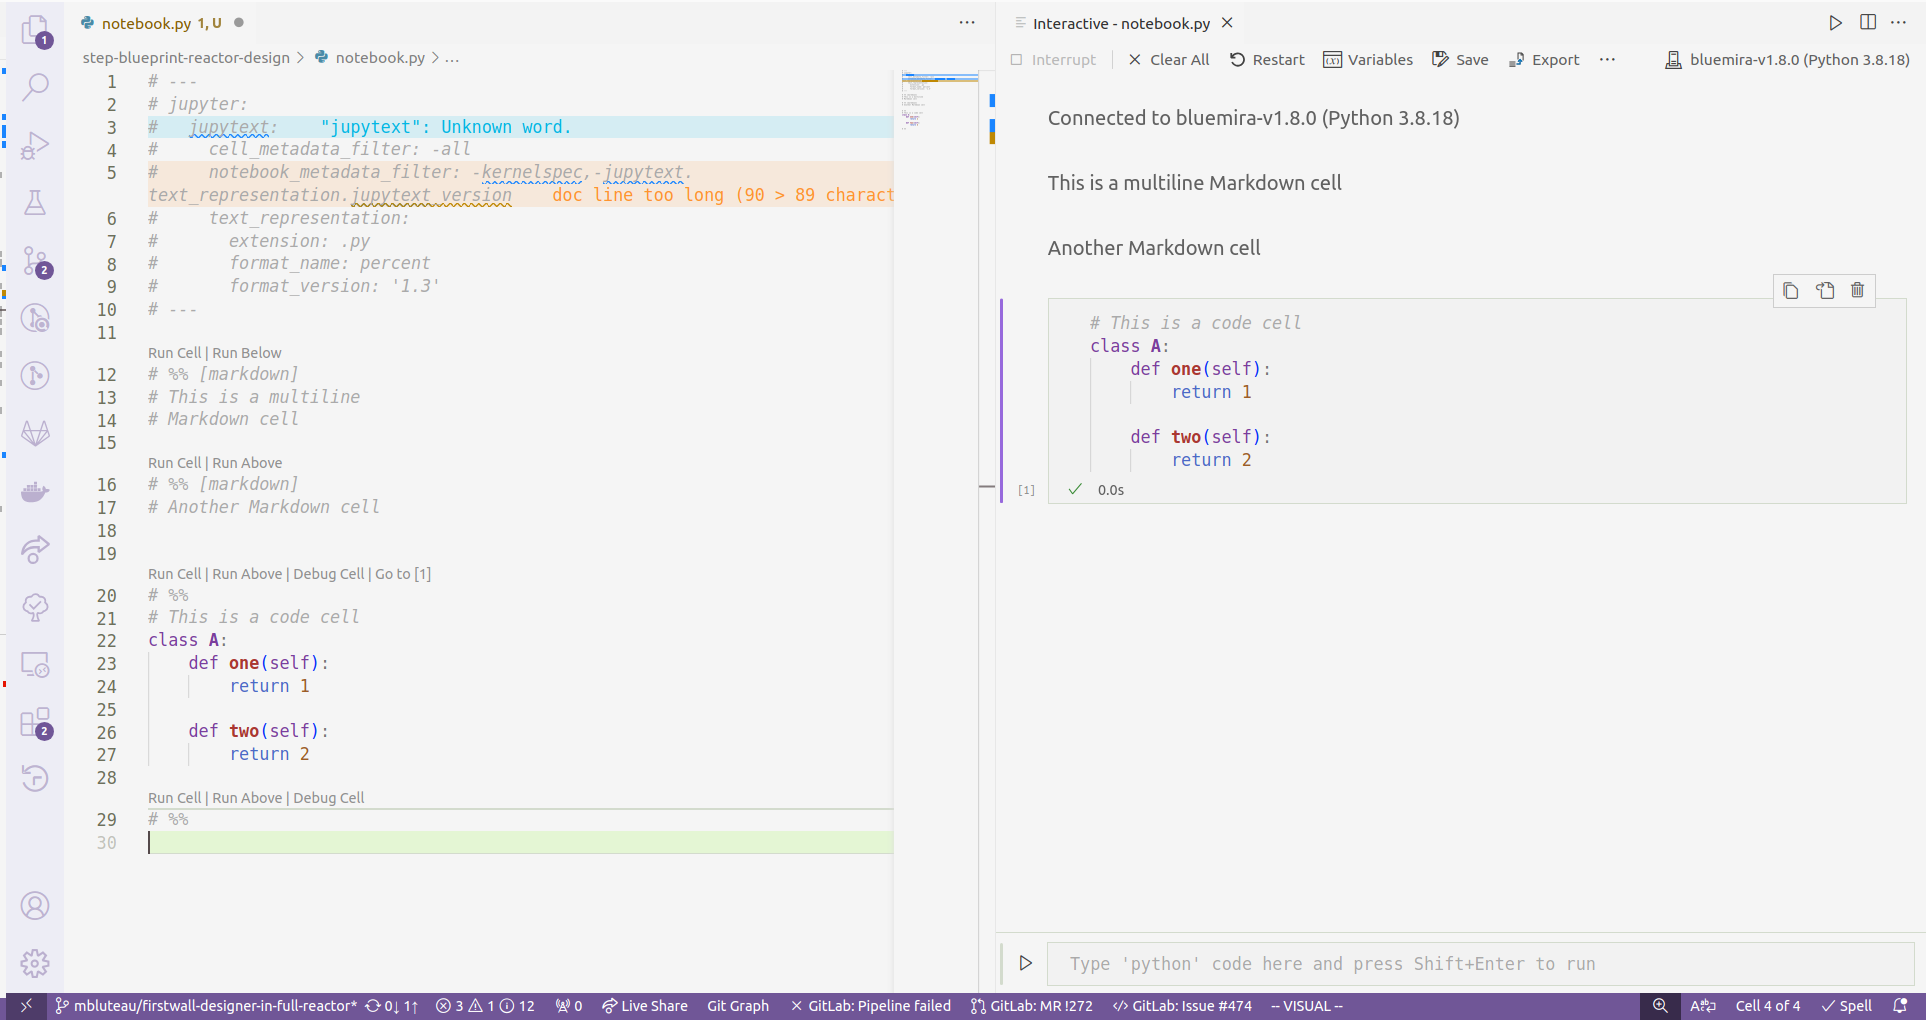 The Interactive Window interface in VS Code… kinda rubbish
So what’s the problem? Well, this Interactive Window interface is demonstrably worse than the Notebook rendering that VS Code also offers. Autocomplete frequently fails in the Interactive Window (right side pane in the figure above), and even when it does work, it tends to not detect any of the non-standard library Python packages you have installed. There have been more than a few people on the internet complaining about these severe deficits, but hey, it might work better for you, so certainly have try before taking my word for it.
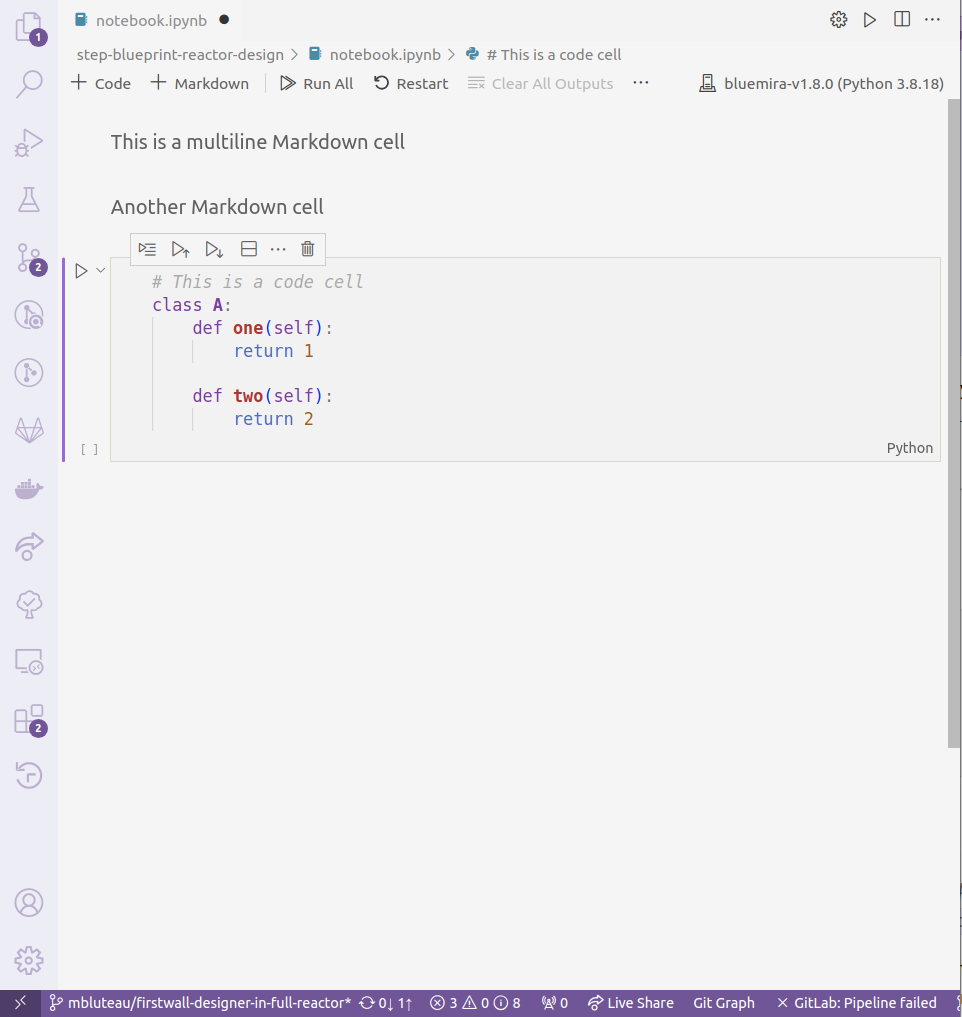 The Notebook rendering interface in VS Code… much better
In order to instead use the Notebook interface, you need to have an .ipynb format file, but this
won’t be present by default in a repository using jupytext because the whole point is to get rid
of tracking this difficult file format. To generate a .ipynb file from a .py text notebook, run
jupytext --sync <example_file>.py
That command might not work if the script has never been “paired” with a notebook file, so instead run
jupytext --set-formats "py:percent,ipynb" <example_file>.py
Open the .ipynb file in VS Code, and you will automatically have the Notebook interface.
The last tricky bit is that any changes to the .ipynb will not be automatically synced
with the paired .py text notebook that actually gets tracked by version control.
There are two complementary options that help with this.
First,
you can create a VS Code task that syncs the current notebook and .py script file you are
editing. Then, if you set this as the default build task, it will be available to run manually
with the shortcut Ctrl+Shift+B. You create this task with a task.json file in the .vscode/
folder of your workspace. It should look like:
{
  "version": "2.0.0",
  "tasks": [
    {
      "label": "Jupytext sync",
      "type": "shell",
      "command": "${command:python.interpreterPath}",
      "args": ["-m", "jupytext", "--sync", "${file}"],
      "problemMatcher": [],
      "group": {
        "kind": "build",
        "isDefault": true
      }
    }
  ]
}
What is nice about this task is that it works both ways. If you want to sync changes that you make
in the .py text notebook to the .ipynb notebook, then execute the task when you are in the
editor for the .py file and jupytext will handle putting those changes into the .ipynb file.
Of course, it is likely you will forget to manually trigger this after making changes you want to
commit. To catch this, you can use the jupytext pre-commit hook that will automatically run the
synchronisation of all scripts and notebooks and prevent a commit if these files are in an
unsynchronised state. Assuming you use the pre-commit framework for your
git hooks, the entry in your .pre-commit-config.yml should be:
  - repo: https://github.com/mwouts/jupytext
    rev: v1.15.1 # CURRENT_TAG/COMMIT_HASH
    hooks:
      - id: jupytext
        entry: jupytext
        args: ["--sync", "--pipe", "black", "studies/**/*.py"]
        always_run: true
        pass_filenames: false
        additional_dependencies:
          - black==23.3.0 # Matches your black hook if you use that
There are a some important notes about this that took me quite a while to figure out. The first is
the always_run flag. This is needed because I intentionally don’t track .ipynb files and if the
changes have been made in a .ipynb file, then by default this hook will not run because none of
the relevant .py files under version control have changed. The other related caveat is that you
therefore need to specify the location of all your text notebook files in the args of your hook
(i.e the last entry in the list above).
Taking all of these little configuration odds and ends together, my experience developing with Jupyter Notebooks in VS Code is now much better, and perhaps yours will be to. Even if you don’t use VS Code, I imagine the pre-commit hook is something that would add value to your development workflow.
Bonus: Jupytext Configuration
Although not strictly necessary for the workflows above, it is worth mentioning that jupytext
itself should be configured so that it doesn’t retain too much noisy metadata. By default,
jupytext retains extraneous bits like the Python kernel version in the header metadata of a Text
Notebook. As with Classic Notebooks, this will vary depending on who opens the notebook. This is
the global configuration for jupytext that I currently use and is contained in pyproject.toml:
[tool.jupytext]
notebook_metadata_filter = "-kernelspec,-jupytext.text_representation.jupytext_version"
cell_metadata_filter = "-all"
Bonus 2: Automatically Triggered Sync in VS Code
Ideally, I would like to not have to remember to synchronise Classic and Text Notebooks when working in VS Code. As soon as I save one, the other should update to match. There default answer from an internet search seems to be the Run on Save extension, but it hasn’t been updated in 5 years, so I am somewhat hesitant to install it. I’m keen to hear if anyone else has solved this in a more elegant manner!